AWS Fundamentals - Part 9: Elastic Block Store
20 Feb 2019In part 5, I talked briefly about the disk options available to you when running EC2 instances - you have the choice of using instance store based disks (i.e. a disk that is directly attached to the underlying host machine that your instance runs on), or to use an Elastic Block Store (EBS) based volume.
Instance store disks are fine for temporary data storage, but aren’t a great choice for data that you want to be persistent - if the underlying host were to fail, or you happen to stop or terminate your instance, the data you have stored on the instance store based disk will be lost forever. If the thought of that upsets you, EBS based disks are the way to go.
One of the key points about EBS is that a storage volume is not “tied” to a particular instance - it’s entirely possible to attach EBS volumes to any instance, as long as that instance sits in the same Availability Zone as the volume. So in other words, I could detach an EBS volume from an instance, destroy that instance and then re-attach the EBS volume to a new instance that I create later.
EBS provides a number of different types of storage volume that differ in terms of both performance and cost. Let’s take a look at what’s on offer.
EBS Volume Types
The volume types on offer from EBS fall into two main categories:
-
SSD backed volumes: As the name implies, these volumes are all based on solid state drives and are the recommended option for many workload types.
-
HDD backed volumes: Volumes based on hard disk drives (i.e. spinning disks) are recommended for throughput intensive workloads.
Amazon then breaks these categories down further into the following volume types:
-
General Purpose SSD (also known as ‘gp2’): This is a good choice for the majority of applications - it provides good level of performance, albeit potentially less ‘consistent’ than the io1 volume type (covered next). The key thing with gp2 volumes is that they provide a certain number of IOPS (I/O Operations per Second) based on the size of the disk. You don’t specify the number of IOPS directly, but instead get a certain level of ‘base performance’ depending on how large the disk is. You also get a certain amount of burst capacity based on a credit system - burst credits are replenished regularly and are consumed whenever you need more than the baseline performance. But of course, if you use up your credits, you are back down to the baseline performance level.
-
Provisioned IOPS SSD (also known as ‘io1’): The difference between gp2 and io1 is that with io1, you are specifying a certain number of IOPS and the system will deliver it - there is no burst credit system as there is with gp2, therefore the number of IOPS you receive is potentially more consistent. As a result, io1 volumes tend to be used for workloads requiring higher IOPS or critical apps that require the more consistent performance.
-
Throughput Optimised HDD (also known as ‘st1’): The first of the HDD offerings provides a relatively low cost volume type with decent throughput. This kind of vlume tends to be useful for big data workloads, log processing, or data warehouses. One thing to bear in mind with HDD volume types is that you cannot use them as boot volumes for EC2 instances.
-
Cold HDD (also known as ‘sc1’): The sc1 volume type offers the lowest cost storage available within EBS. It is typically designed for data that isn’t all that frequently accessed, although still offers a reasonable level of throughput.
Note also that there is a fifth type of volume called Magnetic (also known as ‘standard’) which is still available today, although this is considered to be part of the ‘previous generation’ of storage and generally speaking, shouldn’t be used for new apps.
Creating EBS Volumes
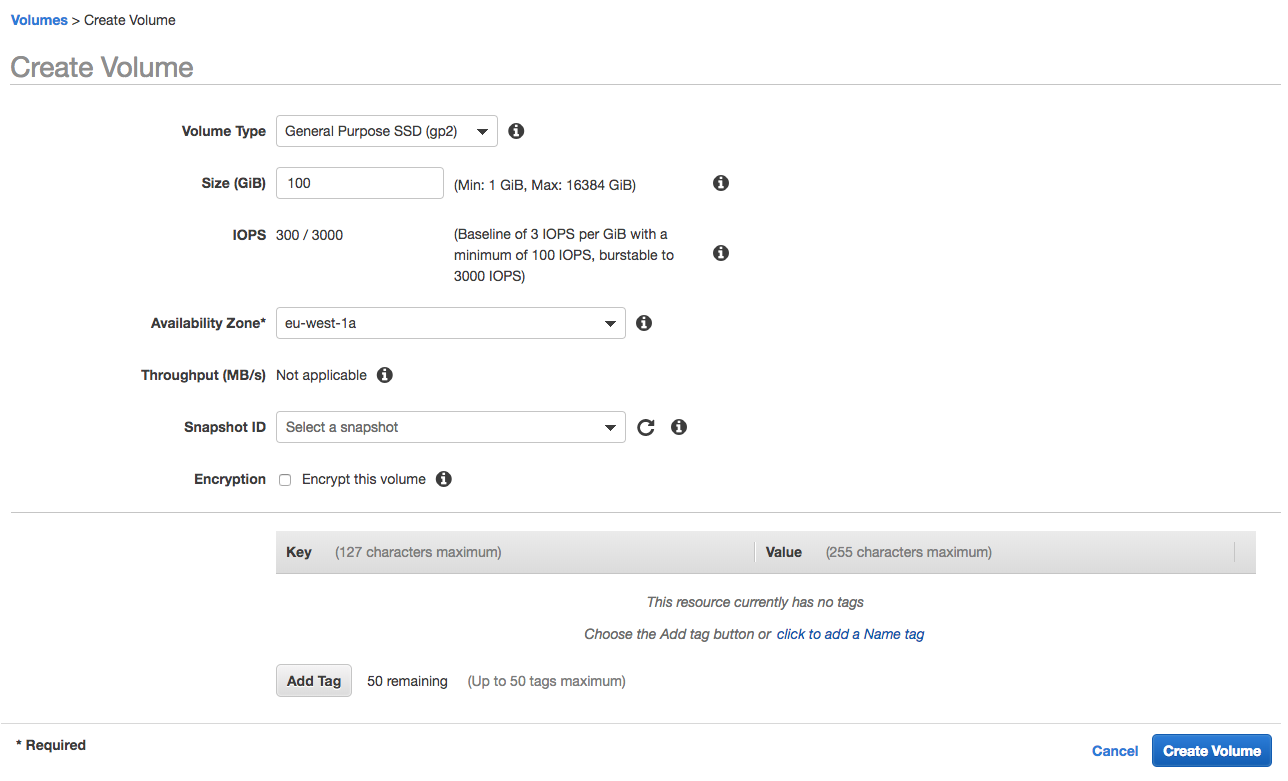
Creating an EBS volume is a pretty easy process. Accessed from the EC2 part of the AWS console, you specify the volume type (as discussed above), the number of provisioned IOPS (in the case of the io1 type), how large you want your volume to be, whether you want your volume to be created from a snapshot (discussed in the next section below) and also whether the volume should be encrypted. Here’s an example:
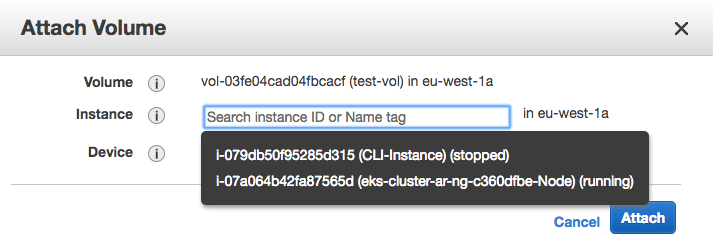
You can then attach the instance to an EC2 instance that resides in the same Availability Zone by selecting the volume and then using the ‘actions’ menu:
Of course, an easier way is to just create the volume as part of the EC2 instance creation, in which case you don’t need to worry about attaching it - that just happens automatically as part of the instance creation.
You can also use the AWS CLI to create volumes - for example:
aws ec2 create-volume --volume-type gp2 --availability-zone eu-west-1a --size 10

{
    "AvailabilityZone": "eu-west-1a",
    "Tags": [],
    "Encrypted": false,
    "VolumeType": "gp2",
    "VolumeId": "vol-0c915a89b173af079",
    "State": "creating",
    "Iops": 100,
    "SnapshotId": "",
    "CreateTime": "2019-02-10T20:47:44.000Z",
    "Size": 10
}
Now that we know how to create an EBS volume and use it from an EC2 instance, let’s look at how we can back up our volumes using Snapshots.
Snapshots
An EBS snapshot is simply a point-in-time back up of the data blocks on an EBS volume. When you take an initial snapshot from an EBS volume, all blocks are copied from the volume to the snapshot - pretty straightforward. However, if you then decide to take subsequent snapshots from the same volume, only the data that has changed since the last snapshot are copied over. This is significant, because it means that a) data is not duplicated many times, which saves and storage costs and b) the time is takes to create the snapshots is greatly reduced.
How does this actually work in practice? What actually happens is that when changed or new data is copied, a new snapshot is created and linked to the previous snapshot. You can read more about this process here.
Let’s look at how you create a snapshot. From the left hand menu within the EC2 part of the console, select ‘Snapshots’ and then ‘Create Snapshot’. You’ll then see the following screen:
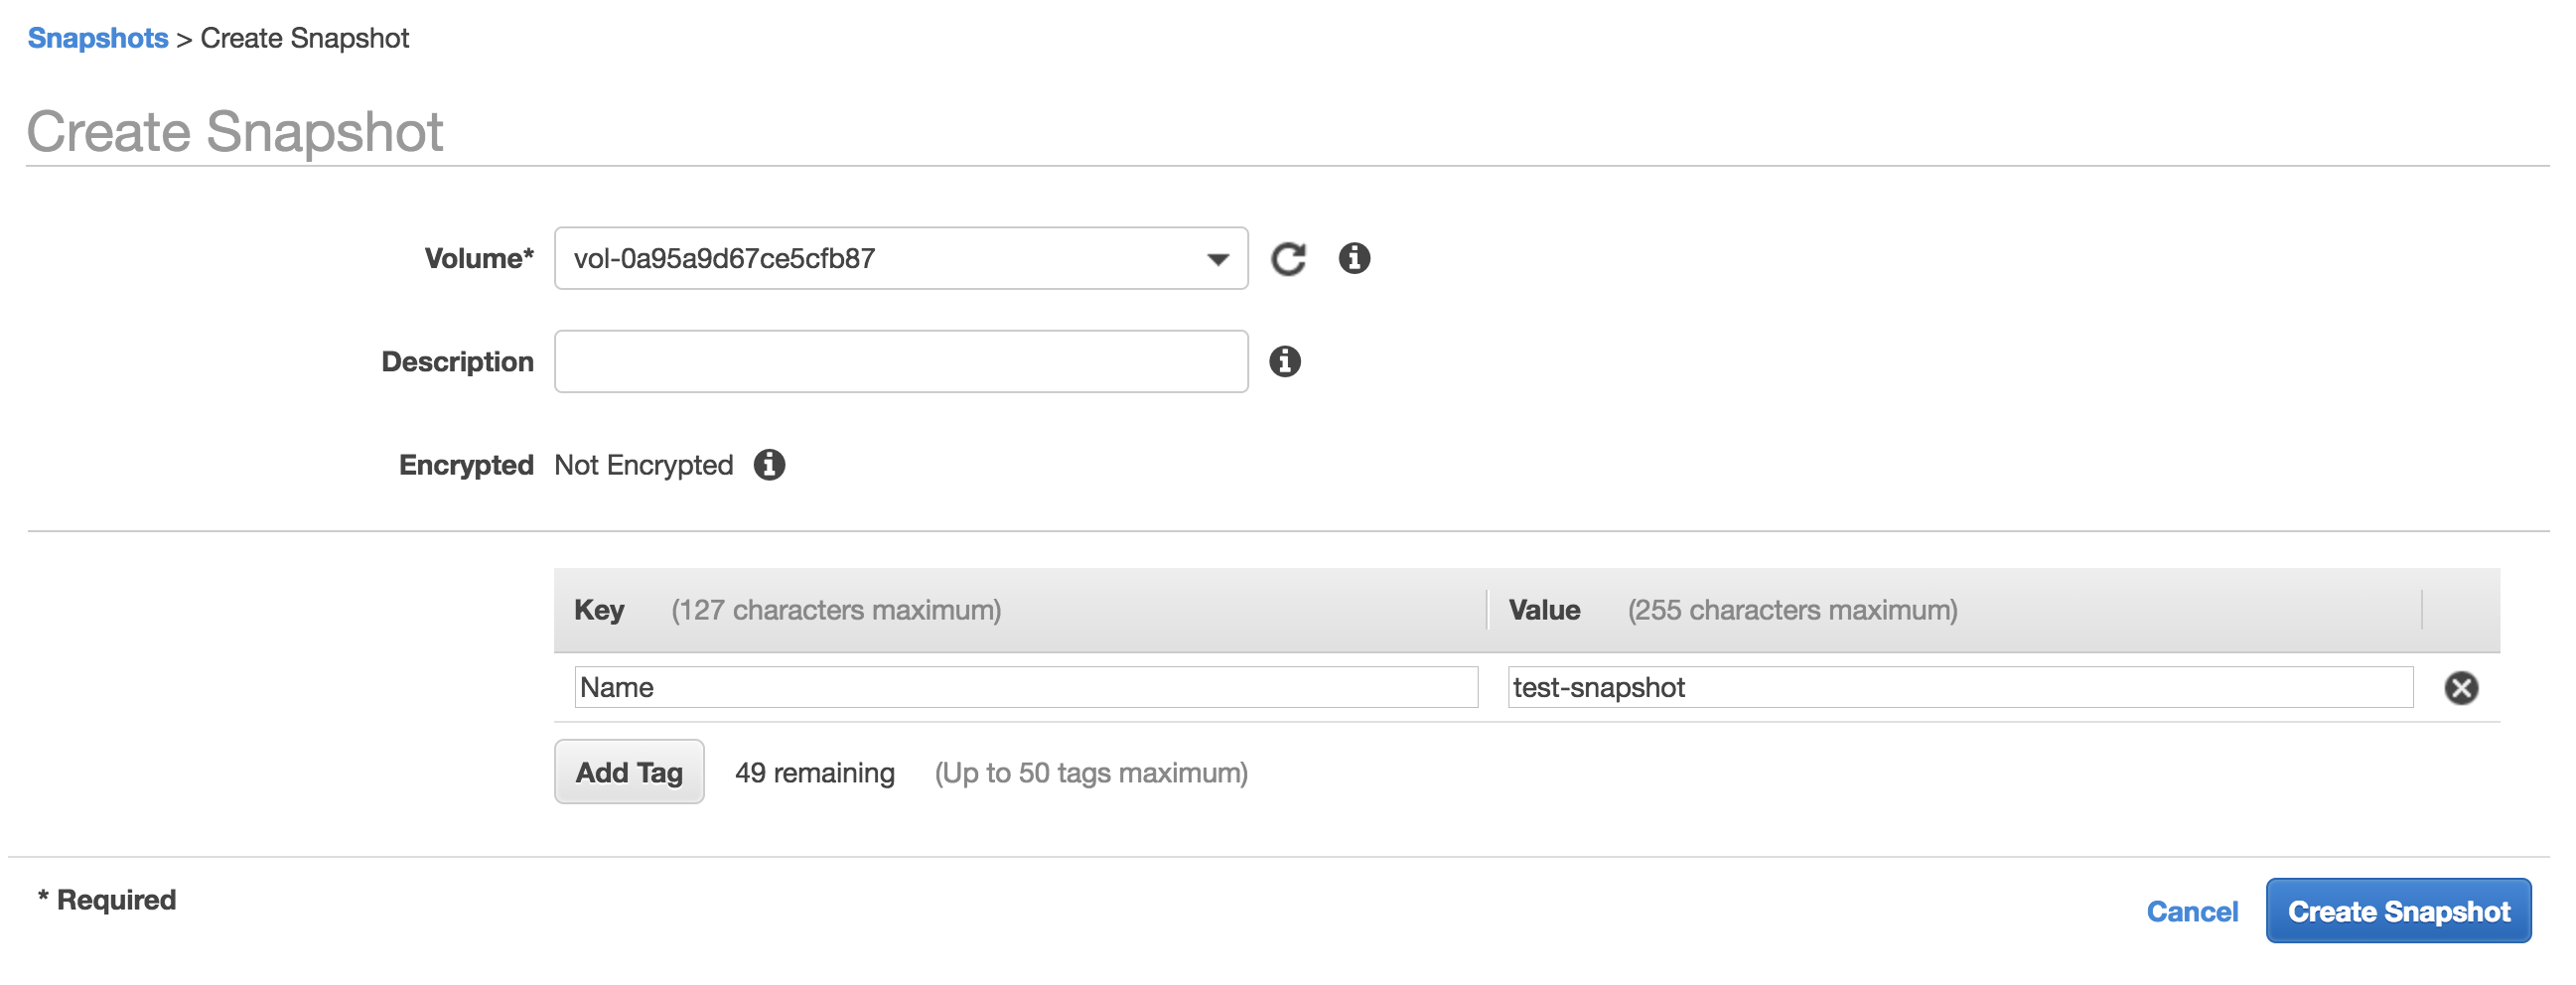
As you can see, this is very simple - you need to specify the volume that the snapshot will be taken from and optionally provide a description and tag. Now once you press the ‘Create’ button, you’ll see a state of ‘Pending’ under the snapshot item that results - what is actually happening here is that the data from the volume is being copied to the snapshot in the background. Depending on how large the volume is, that might take a few hours. Where is the data actually being stored? The snapshots themselves are all stored in S3.
OK, so now that we have our snapshot, what can we do with it? Several things are possible:
-
We could create a new EBS volume from the snapshot.
-
The snapshot can be copied, including to other regions. You might want to do this for a number of reasons, including migrating instances to a different region, disaster recovery purposes, expanding to other geographies, etc.
-
A new AMI (Amazon Machine Image) could be created from the snapshot for use when creating new EC2 instances.
-
We can also share the snapshot with other AWS accounts.
All of the above actions can be carried out from the ‘Actions’ menu within the snapshots area.
I mentioned at the beginning of this section that snapshots can be used to backup up EBS volumes. However, it’s important to understand that snapshots are block level backups - they are not file level backups. What that means is that you can’t simply dip into a snapshot and pick individual files out of it, for example if you have deleted something you shouldn’t have. In order to ‘get at’ the data within the snapshot, you’ll need to do the following:
-
Create a new volume from the snapshot.
-
Attach the new volume to an EC2 instance and mount it.
-
Access the files through the EC2 instance.
Automating EBS Snapshots
For snapshots to be useful as a backup mechanism, there needs to be some way of scheduling snapshot creation automatically - it’s no use if you have to create a new snapshot manually every day. Fortunately there is a way to do this, using a feature called Data Lifecycle Manager (DLM).
DLM can be accessed from the left hand menu of the EC2 area of the console. The primary method for identifying which volumes to back up is by using tags - for example, I could tag each of my volumes with a particular tag (say ‘snapshot:target’) and then configure DLM to look for all volumes with that particular tag and back them up.
In the following example, I want to back up all EBS volumes in my Kubernetes cluster, therefore I am configuring DLM to target all EBS volumes with a tag of ‘EKS-Cluster-1’:
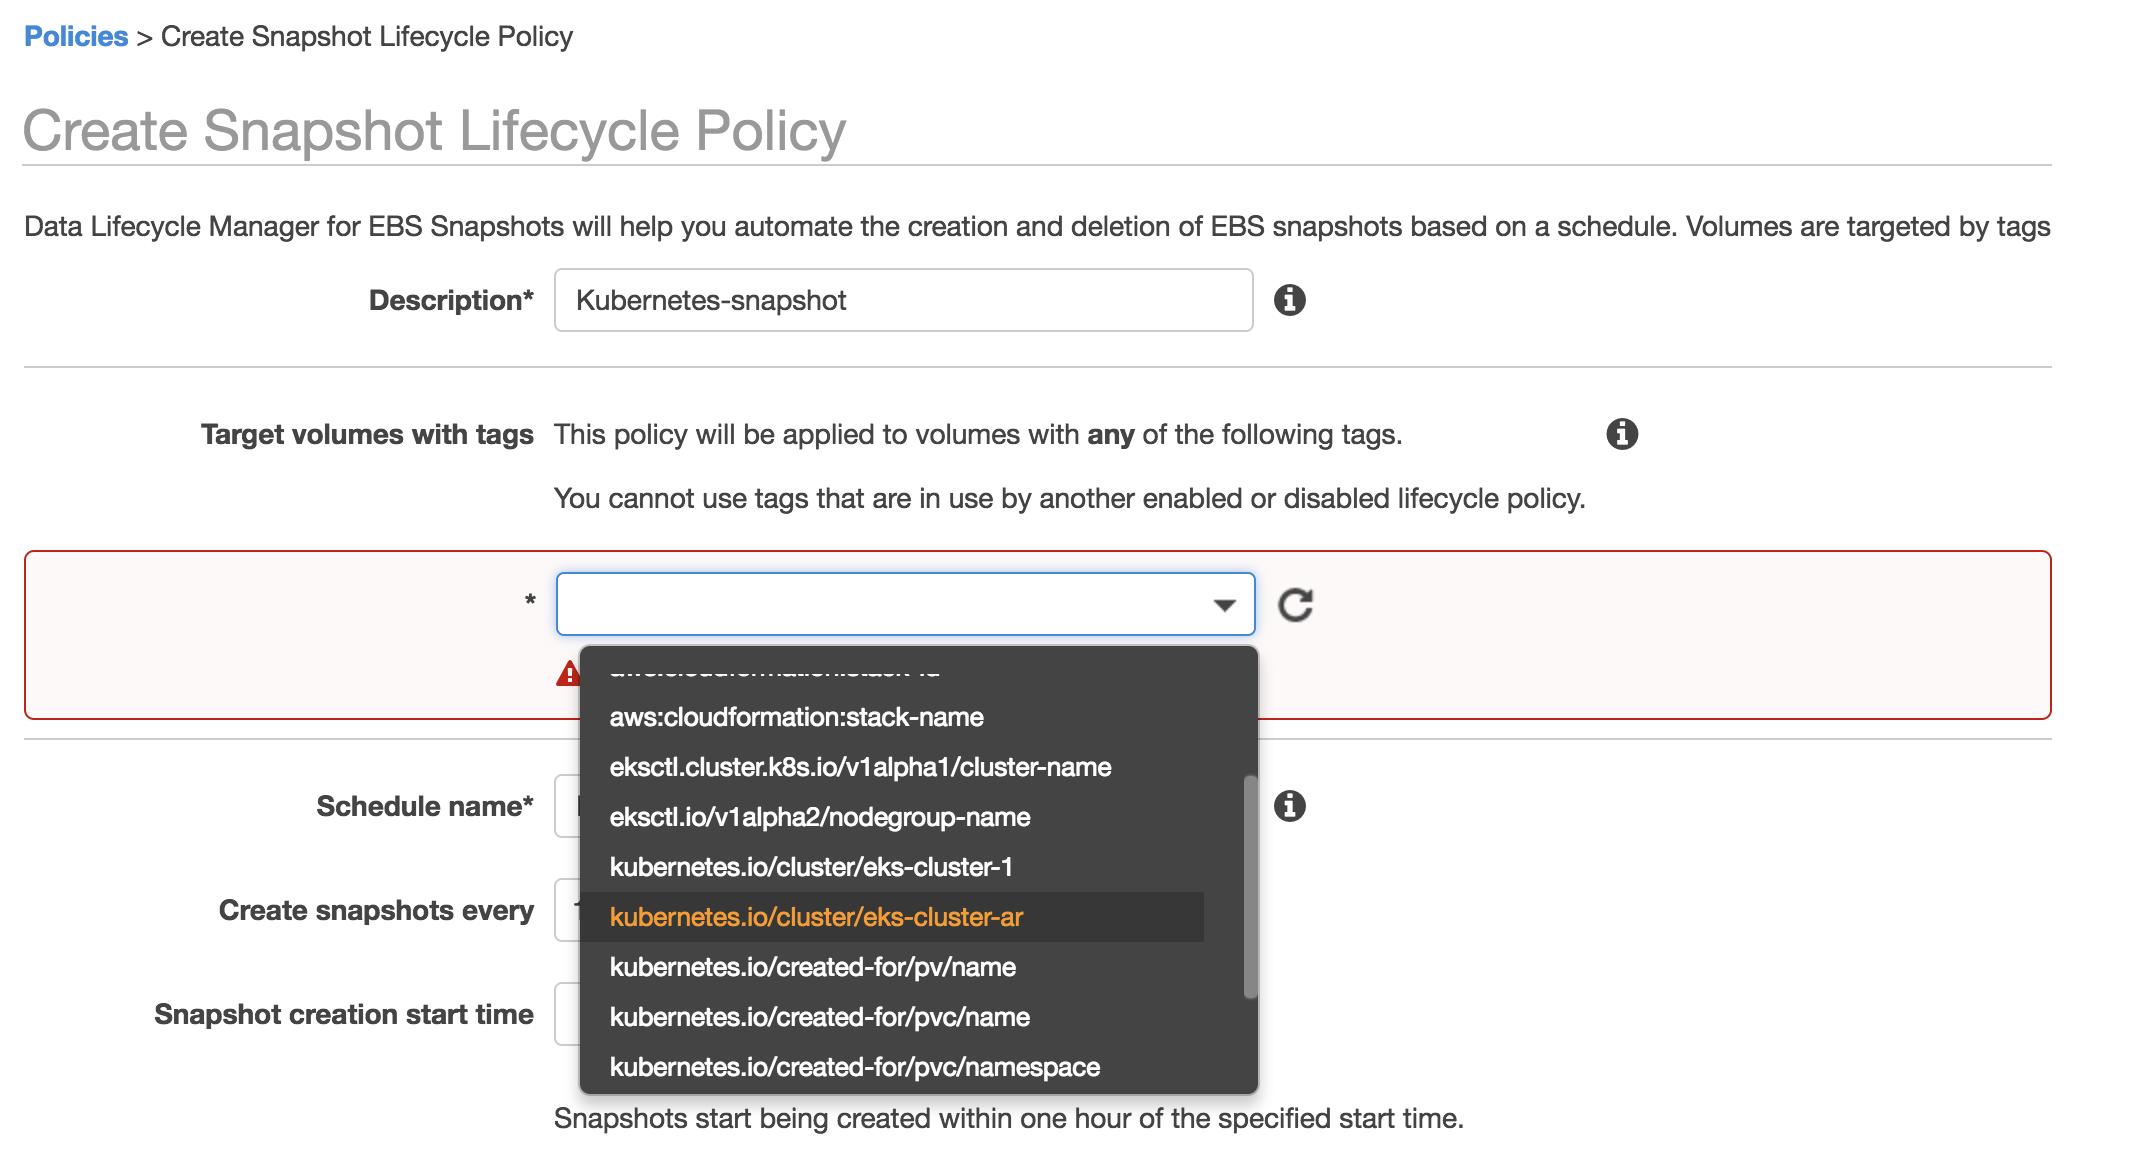
I then tell DLM how often to create the snapshots (every 12 or 24 hours) and the time I want the snapshot start time to be.
OK, hopefully that gives you enough information about EBS to get going. See you next time!